How to make a display cabinet with Melamine MDF Board?
Dec 02, 2025
Leave a message
How to make a display cabinet with Melamine MDF Board?
When it comes to creating a stylish and functional display cabinet, Melamine MDF Board is an excellent choice. As a supplier of Melamine MDF Board, I have witnessed firsthand the versatility and aesthetic appeal of this material in various woodworking projects. In this blog post, I'll guide you through the process of making a display cabinet using Melamine MDF Board, from planning to the final touches.
1. Understanding Melamine MDF Board
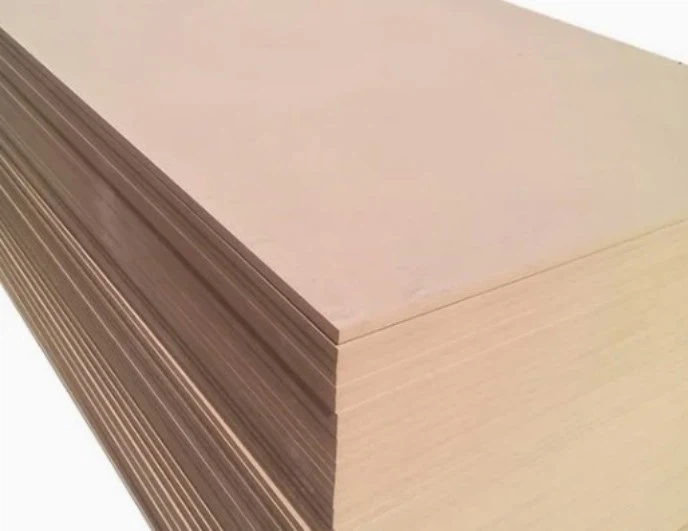
Before we start building, let's take a moment to understand what Melamine MDF Board is. Melamine MDF Board consists of a medium - density fiberboard (MDF) core that is laminated with a melamine resin coating. This coating gives the board a smooth, durable, and attractive finish, available in a wide range of colors and patterns.
The advantages of using Melamine MDF Board for a display cabinet are numerous. It is resistant to scratches, stains, and moisture, making it ideal for long - term use. Additionally, it is relatively lightweight compared to solid wood, which makes it easier to handle during the construction process. If you're interested in exploring our Melamine MDF Board options, you can visit Melamine MDF Board.

2. Planning Your Display Cabinet
The first step in making a display cabinet is to plan its design and dimensions. Consider the space where the cabinet will be placed, the items you want to display, and your personal style preferences. Sketch out a detailed design on paper, including the overall shape, the number of shelves, and any additional features such as glass doors or drawers.
Measure the available space carefully to ensure that your cabinet will fit properly. Decide on the height, width, and depth of the cabinet. A standard display cabinet might be around 72 inches tall, 36 inches wide, and 12 - 18 inches deep, but you can adjust these dimensions according to your needs.
3. Gathering Materials and Tools
Once you have a clear plan, it's time to gather the necessary materials and tools.
Materials:
- Melamine MDF Board: You'll need enough board to construct the sides, top, bottom, shelves, and any other components of your cabinet.
- Hinges: For the doors, if you're including them.
- Handles: To make it easy to open the doors or drawers.
- Screws and nails: For joining the pieces of the cabinet together.
- Glass panels: If you want to have glass doors or windows in your cabinet. You can choose clear, frosted, or textured glass depending on your preference.
- Wood glue: To reinforce the joints.
Tools:
- Circular saw or table saw: To cut the Melamine MDF Board to the required sizes.
- Drill: For making holes for screws and attaching hardware.
- Screwdriver: To tighten screws.
- Measuring tape: To ensure accurate measurements.
- Clamps: To hold the pieces together while the glue dries.
- Sandpaper: To smooth the edges of the cut boards.
4. Cutting the Melamine MDF Board
Using your circular saw or table saw, carefully cut the Melamine MDF Board according to the dimensions you planned. When cutting, make sure to use a sharp blade to get clean, straight cuts. It's a good idea to make a test cut on a scrap piece of board first to ensure that the blade is set at the correct depth and angle.
Wear safety goggles and a dust mask to protect yourself from sawdust. After cutting each piece, use sandpaper to smooth the edges. This will not only make the cabinet look more professional but also prevent any splinters.
5. Assembling the Cabinet
Start by assembling the frame of the cabinet. Use wood glue and screws to join the sides, top, and bottom pieces together. Apply a thin layer of glue to the edges of the boards and then use clamps to hold them in place while the glue dries. Make sure the corners are square by using a carpenter's square.
Next, install the shelves. You can attach them to the sides of the cabinet using screws or by creating grooves in the sides for the shelves to slide into. If you're adding drawers, construct them separately and then install them in the cabinet using drawer slides.
6. Adding Doors and Hardware
If you're including doors in your display cabinet, attach the hinges to the doors and the cabinet frame. Make sure the doors open and close smoothly. Then, install the handles on the doors and drawers.
If you're using glass panels, carefully insert them into the door frames. You can use glazing points or silicone sealant to hold the glass in place.
7. Finishing Touches
Once the cabinet is assembled, take a step back and look for any rough edges or gaps. Sand down any rough spots and fill in the gaps with wood filler. After the filler has dried, sand it smooth.
You can also add a protective finish to the cabinet to enhance its durability and appearance. Some Melamine MDF Boards come with a pre - finished surface, but you can still apply a clear coat of varnish or polyurethane for extra protection.
8. Installation and Placement
Finally, move the display cabinet to its intended location. Make sure it is level by using a spirit level. If necessary, adjust the legs or use shims to ensure that the cabinet stands evenly.
Arrange your items in the cabinet and enjoy your newly made display cabinet!
Conclusion
Making a display cabinet with Melamine MDF Board is a rewarding project that allows you to create a unique piece of furniture that suits your needs and style. As a supplier of Melamine MDF Board, we offer high - quality products at competitive prices. If you're interested in purchasing High Quality Plain MDF Board With Competitive Price or Furniture Grade MDF Board for your next project, please feel free to contact us for more information and to discuss your procurement needs. We're here to assist you in bringing your woodworking ideas to life.
References
- Woodworking for Beginners: A Comprehensive Guide.
- Melamine MDF Board Product Manuals.